What are these things? Need a quick, easy, cheap, mold-free, and surprisingly durable shed or greenhouse? Then you're going to like this post.

In a number of different posts on building I've shared some of the problems with conventional buildings that make them prone to mold. For people who have experienced Mold Toxin Illness this becomes challenging when trying to create a mold-free environment.

Wood products seem like the go-to for almost any building project. But wood products are cellulose, toxic mold's favorite food. Mold spores are everywhere so as soon as there's enough moisture mold starts growing on the cellulose. If there's no light or wind, it's even better for aggressive mold growth.

Look up simple DIY greenhouses or sheds and you'll find no shortage of ideas. But almost all of them include wood at least at one point or another. I keep arriving back at PVC for a handy, mold-resistant building material for various projects. Regular PVC will not hold up to very much sun exposure, something we have no shortage of in Arizona. But both furniture grade and conduit PVC are UV resistant.

A hoop house is commonly put together using PVC or metal conduit (metal requires a hoop bender). I used 10' PVC conduit (1") which has one bell end for sliding another piece into. To make a hoop I put two of them together (20') and slipped the ends over two rebar stakes that I had hammered all but a foot into the ground 10' apart. I placed four more hoops, one every five feet, for a length of 20'. This gives you a 10' x 20' floor space, or 200'². These dimensions can be easily adjusted - some are made hundreds of feet long.

This hoop structure can then have a cover attached (eg. tarp, greenhouse plastic, shade cloth). But what about the ends? This is where the wood usually comes in: Build a frame that includes a door frame and add purlins to the hoops for stability. Alternatives?
Use cover material on the ends and install either one or two zippers that open from bottom to top (still needs hoop stabilization).
Purchase a stabilizer kit with a metal end-frame and door (this would have increased the total cost of my build by at least double).
Or…
Enter the Caterpillar Tunnel!
This concept is super-simple and puts greenhouse food production technology within reach of almost any budget. Instead of attaching the covering to the hoops you just use a longer covering so that each end can be tied to a T-post. To stabilize the hoops you run a rope across the top, wrapping it once around each hoop, and tie each end to the T-post.
This post isn't intended to be a DIY tutorial. There are plenty of those you can easily find online if you're going to build one of these. I'm just sharing some helpful tips that I learned when I made both a shed and a greenhouse.
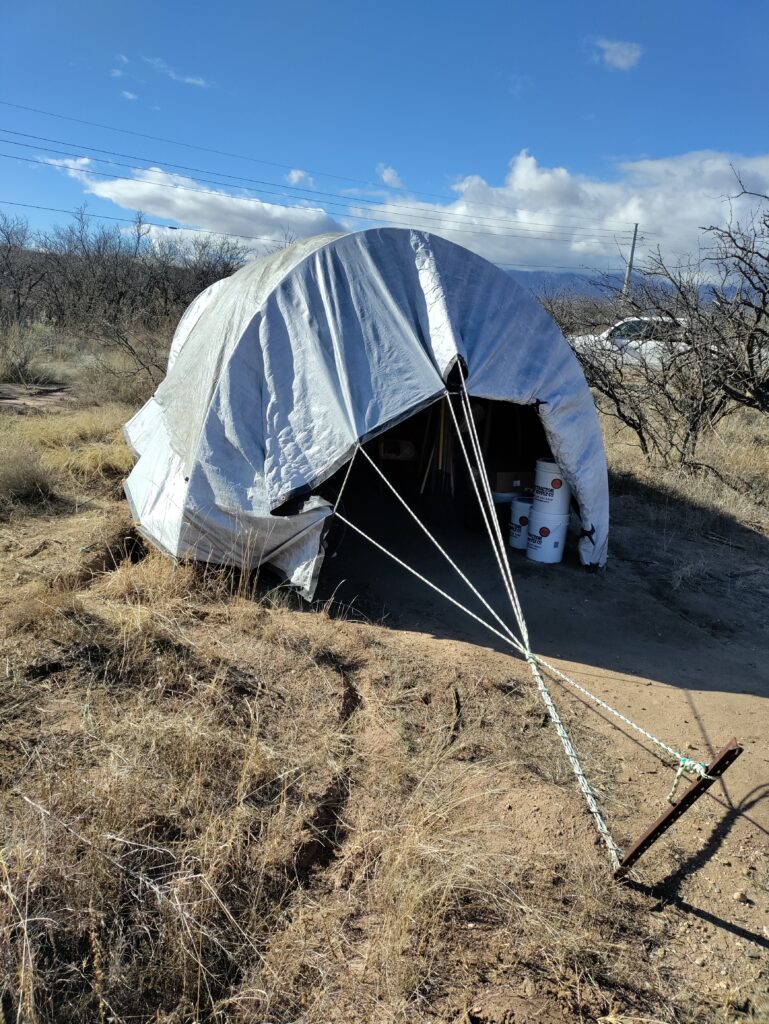
The shed was made about six months ago and withstood monsoon storms including 50 mph winds. It's not a true caterpillar tunnel but it borrows heavily from the idea. The frame was built exactly as described above. The covering was a 20' x 30' tarp that unfortunately already had some wear and tear before it was employed. Theoretically a 20' x 20' tarp would fit perfectly over the hoops from end to end and side to side. But one side was a couple feet short of reaching the ground (so I ran bungee cords from the tarp grommets to stakes in the ground) and it only extended about five feet past each end (caterpillar tunnels have about 15' of extra material at each end to attach to the T-post). The rope that secures the hoops was longer than I needed (100') so after looping it around the T-posts I was able to run it through grommets to secure the tarp.
It required redoing little parts of it several times during monsoon season. From what I had read you should secure your covering as tight as possible so the wind can't get underneath or create a lot of flapping. Only one side would reach the ground so I had that side face the prevailing wind and I put stakes through every grommet. But winds would come from every direction in different storms and that side always fared the worst with stakes frequently being ripped out of the ground. The side that was secured with bungees just bounced around, constantly shifting with the wind so stakes didn't have near the stress. Finally tired of re-staking the tight side in ever-looser holes I redid it with bungees and quit having problems.
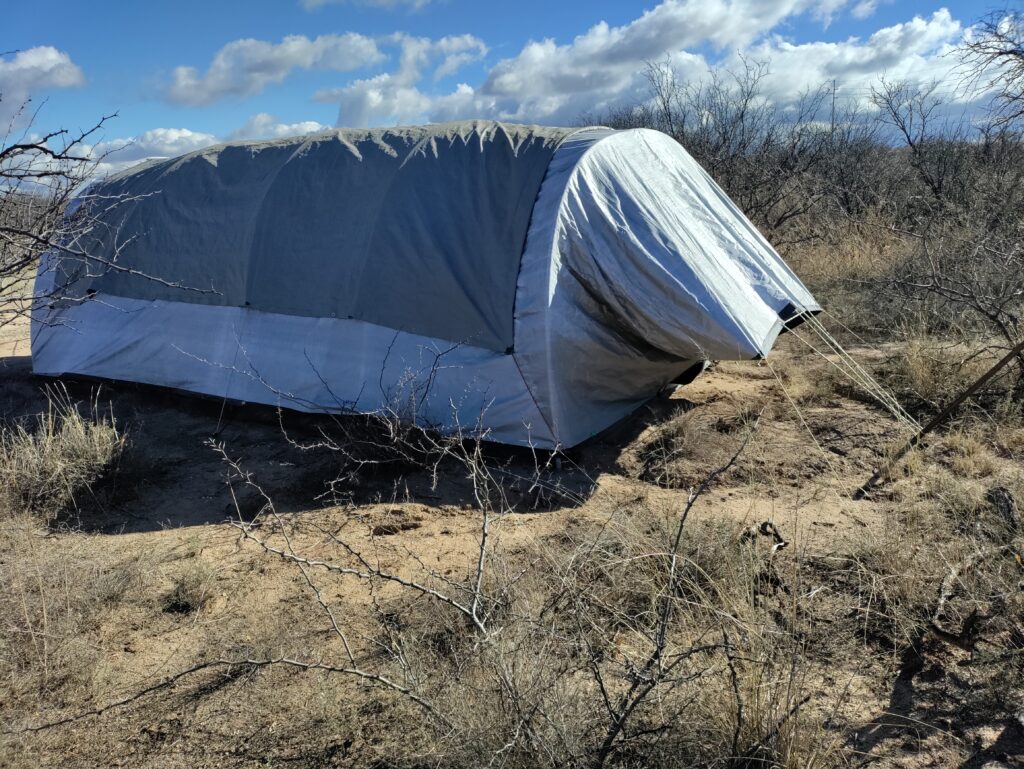
Hoop House Northeast SideHoop House West Side
This works really well for a shed. One of the benefits is a lot of airflow (with no strong winds inside) to help keep mold at bay. The tarp already had some spots that only became weaker in the sun and winds and started leaking. We had another tarp we'd used to protect the dome we were building during monsoons so we bungeed it on top of the other to keep winter rains from seeping through. Other than that it has held up amazingly well considering all the abuse it gets.
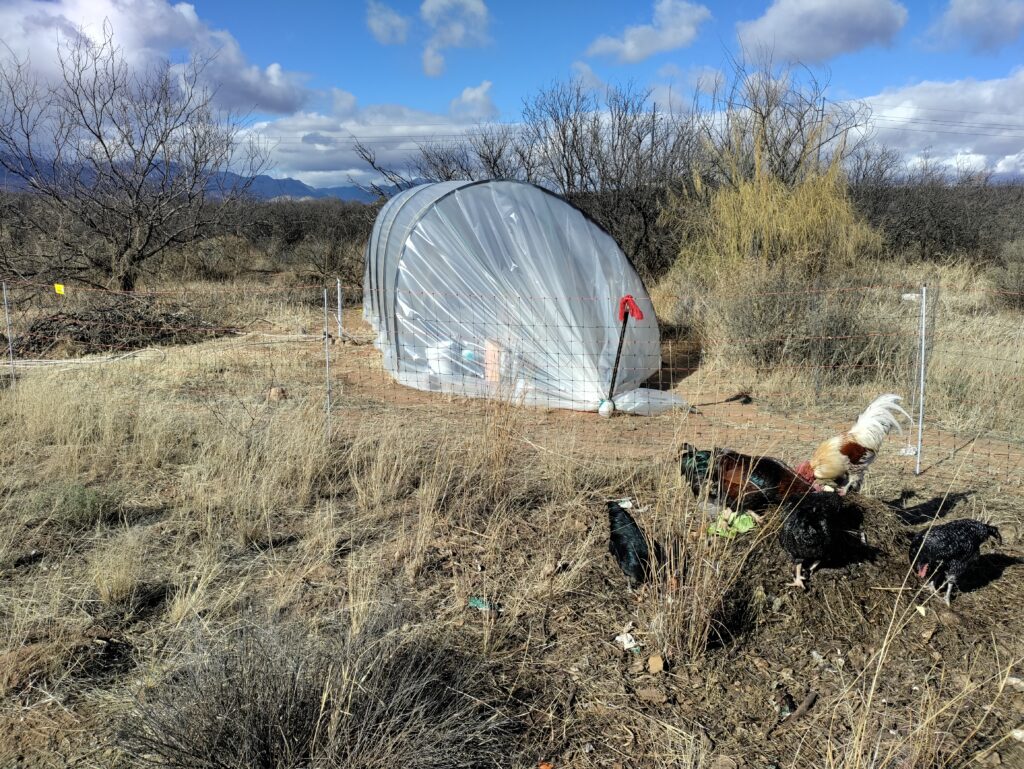
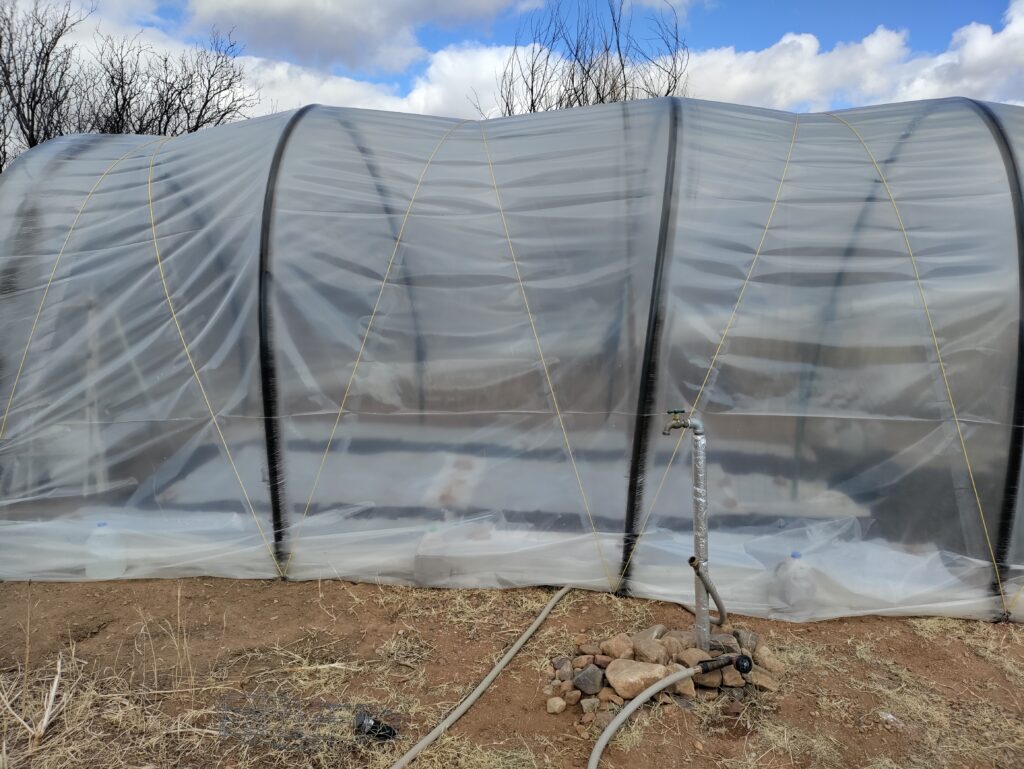
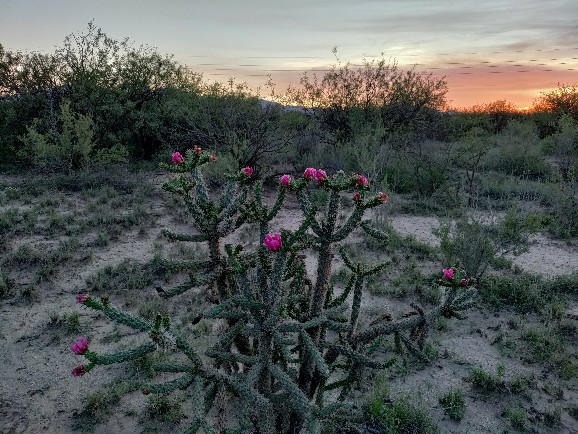
Since the shed survived our extreme weather, we went ahead and built an actual caterpillar tunnel greenhouse (see top photo) a couple months ago. It has also withstood 40-50 mph winds. I used the same hoop structure described above and greenhouse plastic that is warrantied to last four years (I painted the PVC because the greenhouse plastic reacts to it). I plan to switch it out with shade cloth in the summer.
Did you notice how it leans into the wind? This was unintentional but it has worked out well. If you want it to lean a certain direction, just lower that side or elevate the opposite side. Another tip I'll share really simplified the setup and reduced the cost. You'll notice there's external cord on top of the plastic that pulls it down between the hoops giving it that caterpillar look. An entire duplicate set of stakes is often used to secure the cord to the ground. I knew there had to be a way to use the same stakes that you slip the hoops over. There's a company that sells an expensive metal piece with a hole to slip over the stake and another hole to attach the cord to. I just used carabiners.
Caterpillar Tunnel
What else could you do with these ideas? Camping shelter? Animal shelter? What other ideas are sparked by this? The girls recently planted an experimental winter garden inside the greenhouse. I'll have to share more about that in another post.
Chris Stevens
Dedicated Christian, patriot, family man, founder of Sabbatical Ranch